Why Is My Air Conditioner Not Blowing Cold Air?

When your air conditioner stops blowing cold air, it can be more than an inconvenience—especially during hot weather. If you’re facing this issue, understanding the mechanics of your system, mainly if it incorporates a heat pump, is crucial. Here’s a detailed exploration of why your air conditioner or heat pump might not be cooling your space effectively, along with some troubleshooting tips.

Table of Contents

Thermostat Settings

The first and simplest thing to check is your thermostat settings. Ensure the thermostat is set to “cool” and not “heat” or “fan only,” which are standard settings on heat pump systems. The temperature should also be set lower than the current room temperature to activate the cooling cycle.

Airflow Issues

Restricted airflow can severely impact your system’s efficiency. Check for:

  • Dirty air filters: A clogged filter can impede airflow, reducing the system’s ability to circulate cool air.
  • Blocked or closed vents: Ensure all vents are open and unobstructed to allow free air movement.
  • Issues with ductwork: Leaks or blockages in the ductwork can lead to significant cooling loss.

Refrigerant Levels

Both traditional air conditioners and heat pumps rely on refrigerant to cool your home. If your system has a refrigerant leak or is low on refrigerant, it will fail to cool efficiently. Signs of low refrigerant include ice buildup on the refrigerant lines and the outdoor unit, as well as hissing noises from refrigerant leaks.

Heat Pump Specific Issues

Heat pumps operate differently from standard air conditioners because they can heat and cool a home by reversing the refrigeration cycle. Typical heat pump issues include:

  • Stuck in heating mode: Occasionally, the reversing valve that changes the refrigerant flow for heating or cooling might get stuck, causing the system only to heat.
  • Defrost mode: Heat pumps may defrost mode during cold weather to prevent ice from building up on the outdoor unit. If stuck in this mode, it won’t cool as intended.

Electrical Problems

Electrical issues can affect any air conditioning system. Check for:

  • Tripped circuit breakers or blown fuses: Reset the breaker or replace fuses as necessary.
  • Faulty capacitors or relays: These components are vital for starting the compressor and fan. A failure here can stop the entire system.
Compressor Issues

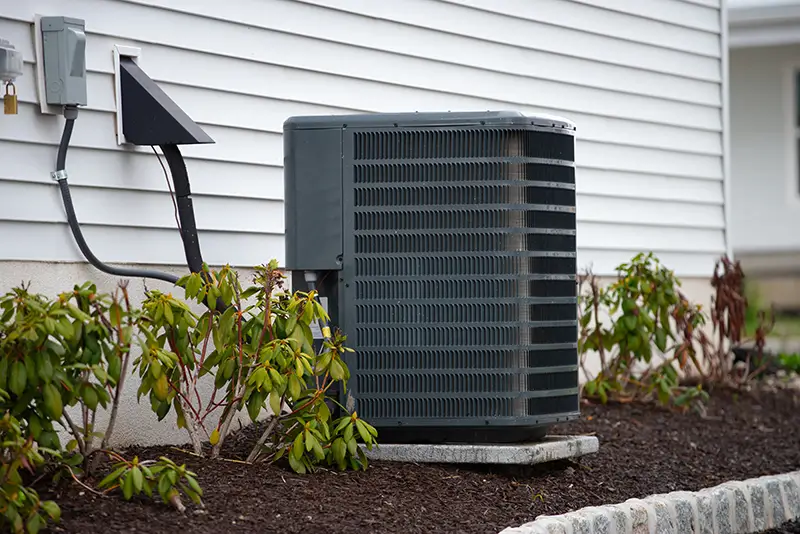
The compressor is the heart of your air conditioning system, pumping refrigerant through it. If it malfunctions, the whole system will fail to cool. Dirty coils, inadequate refrigerant, or electrical issues can cause compressor problems. Unfortunately, compressor repairs are complex and usually require professional service.

Maintenance and Age

Regular maintenance is crucial for air conditioning and heat pump systems to operate efficiently. Lack of maintenance can lead to problems that prevent cooling. Moreover, older units may lose efficiency or end their operational life.

Troubleshooting Tips

Before calling a professional, here are a few things you can try:

  1. Clean or replace the air filter.
  2. Check and clean the outdoor and indoor units to ensure they are not obstructed or dirty.
  3. Inspect the thermostat and settings for proper operation.
  4. Reset the system, simply turning the system off and on can clear any minor glitches.

When to Call a Professional

If basic troubleshooting doesn’t resolve the cooling issue, especially if you suspect refrigerant problems or compressor failure, it’s time to call a certified HVAC technician team like HOP Energy. We can perform more detailed diagnostics and safely handle complex repairs, ensuring your system is efficient and effective.

Understanding these potential issues and regular maintenance can help keep your air conditioner or heat pump in top condition, ensuring you stay relaxed and comfortable regardless of outside heat.

The Ultimate Moving Checklist: Stress-Free Move with an Eye on Heating, Air Conditioning, and Energy Costs

Moving home

Moving homes is often a mix of excitement and apprehension. It’s not just about packing boxes and hiring movers; it involves careful planning, especially when it comes to the comfort and cost-efficiency of your new living space. This guide aims to provide you with an all-encompassing approach to ensure a smooth transition, with a special focus on managing heating, air conditioning, and energy costs, which are crucial but often overlooked aspects of a move.

Table of Contents

Pre-Move Preparations

Getting Ready for the Big Move: Embarking on a new chapter in your life starts with meticulous preparation. This phase is all about laying the groundwork for a successful move. By budgeting carefully, choosing the right moving date, and deciding between a DIY move or hiring professionals, you set the stage for a seamless transition. Special emphasis should be placed on understanding and preparing for the heating and cooling needs of your new home, ensuring comfort from day one.

Two Months Before Move

Setting the Foundation: With two months to go, it’s time to dive into the details. Researching and comparing moving companies or rental options will help you find the best fit for your needs and budget. Decluttering not only simplifies the move but also gives you a fresh start in your new home. Establishing a detailed moving budget at this stage, including anticipated costs for heating and cooling, is crucial for avoiding unexpected expenses.

  • Research and compare moving companies or rental options.

  • Start the decluttering process.

  • Create a detailed moving budget, including potential costs for heating/cooling your new home.

getting ready for moving day

Six Weeks Before Move

Gearing Up: As your move draws closer, begin gathering your packing supplies and start packing items you won’t need in the immediate future. This is also the ideal time to investigate the heating and air conditioning systems in your new home. Understanding their efficiency and maintenance history will help you plan for any necessary updates or services, ensuring a comfortable environment when you arrive.

  • Gather necessary packing supplies.

  • Begin packing non-essential items.

  • Investigate the heating and air conditioning systems in your new home to understand their efficiency and maintenance history.

One Month Before Move

Finalizing Details: A month before the move is the time to tie up loose ends. Inform your landlord or prepare your house for sale, start the process of changing your address, and ensure all school records are set to be transferred if necessary. Contacting utility companies to understand the energy costs and billing cycles in your new home will help you budget for future expenses and avoid surprises.

  • Notify your current landlord or prepare your home for sale.

  • Start the change of address process (postal service, banks, etc.).

  • Arrange for the transfer of school records, if applicable.

  • Contact utility companies to understand energy costs and billing cycles for your new home.

Two Weeks Before Move

Last-Minute Preparations: With just two weeks left, confirm your arrangements with the moving company or truck rental. Finish packing most of your belongings, keeping in mind the climatic conditions of your new location. This is also when you should schedule the disconnection and reconnection of utilities, including services related to heating and air conditioning, to ensure your new home is ready upon arrival.

  • Confirm arrangements with your moving company or truck rental.

  • Pack most of your belongings, keeping the weather and season in your new location in mind.

  • Schedule utility shut-offs at your current home and set up utilities at your new home, including heating and air conditioning services.

One Week Before Move

The Home Stretch: One week out, focus on completing your packing, leaving only the essentials unpacked. Assemble an essentials box for moving day, and confirm your travel plans. Take into account any weather-related issues that might impact your move, especially those that could affect the heating or air conditioning needs during transit.

  • Complete most of your packing, leaving out only essentials.

  • Prepare an essentials box for moving day.

  • Confirm your travel arrangements and prepare for potential weather-related issues, particularly if heating or air conditioning is a concern during your move.

Moving Day

The Big Day: On moving day, your primary role is to oversee the process, ensuring everything goes as planned. Conduct a thorough final walkthrough of your old home, making sure all systems, including heating and air conditioning, are properly shut off or adjusted. Keep all important documents handy, particularly those related to the utilities and systems of your new home.

  • Supervise the movers or coordinate the move yourself.
  • Conduct a final walkthrough of your old home, ensuring that the heating and air conditioning are turned off or set appropriately.
  • Keep important documents and valuables, including contracts or warranties for your new home’s heating and air conditioning systems, with you.

Arrival at New Home

New Beginnings: Upon arriving at your new home, start by unpacking the essentials. Immediately check the heating and air conditioning units to ensure they are functional. Inspect all delivered items for damage and begin familiarizing yourself with the new home’s features, particularly the thermostat and any energy-saving elements.

  • Start unpacking, focusing on essentials first.
  • Check the condition of the heating and air conditioning units upon arrival.
  • Inspect all delivered items for any damage.
  • Familiarize yourself with the thermostat and any energy-saving features of your new home.

Post-Move

Settling In: After the move, update your address with important institutions and register for local services. This is also the time to schedule maintenance checks for your home’s heating and air conditioning systems, ensuring they are efficient and reliable. Explore energy-efficient upgrades and utility savings programs in your new community to maximize comfort and minimize costs.

  • Update your address with your employer, insurance companies, etc.

  • Register for new local services, including healthcare and vehicle registration if necessary.

  • Schedule a maintenance check for the heating and air conditioning systems to ensure they are functioning efficiently.

  • Explore options for energy-efficient upgrades or utility savings programs in your new community.

Ongoing

Maintaining Your New Home: In the months following your move, keep a close eye on your energy bills to establish a baseline for your home’s heating and cooling costs. Embrace energy-saving practices, like using programmable thermostats and updating insulation, to optimize your home’s efficiency and reduce expenses over time.

  • Monitor your energy bills in the first few months to establish a baseline for your heating and cooling costs.

  • Consider energy-saving practices to reduce costs, such as using programmable thermostats, sealing drafts, and updating insulation if necessary.

Regularly monitor your energy bills to understand your heating and cooling costs. Investigate energy-saving methods, such as smart thermostats or improved insulation, to make your new home more cost-effective and comfortable.

Summary

Moving is a significant life event, and with proper planning, it can be a smooth and exciting transition. By paying close attention to details, especially regarding your new home’s heating, air conditioning, and energy efficiency, you can ensure not just a successful move, but also a comfortable, cost-effective start in your new home.

Common Problems Associated with Musty AC Units

Air Conditioners expert

Experiencing the unpleasant smell of a musty air conditioner? There’s no need to feel embarrassed or uncertain about reaching out to your local HVAC technician. In fact, the presence of an odor can serve as a helpful indicator in diagnosing issues with your HVAC system.

Frequently Asked Questions about Smelly Air Ducts and HVAC Units

Before we address common concerns related to your smelly air conditioner, it’s crucial to emphasize one scent that should never be ignored: natural gas. Often likened to the smell of rotten eggs, if you detect an odor reminiscent of sulfur, immediately contact emergency services by dialing 911 and vacate the premises. It’s important not to manipulate light switches, appliances, or windows, nor should you attempt to locate the source of the smell on your own.

While a musty odor emanating from your AC unit may cause some concern, it does not constitute an emergency. Nonetheless, ignoring the smell would be unwise as it signifies improper functioning of your AC unit.

Why Does My Air Conditioner Emit a Musty Odor?

Typically, musty smells from air conditioner units stem from the accumulation of water in drain pans, drip lines, or ducts. However, a dirty air filter can also be a contributing factor.

Possible Cause #1: Full Drain Pan

Your AC unit extracts moisture from the air within your home, with water droplets collecting in the drain or drip pan. Over time, these pans may become breeding grounds for mildew or mold. To eliminate the odor, consider replacing the drip pan located beneath your system’s evaporator coils.

Possible Cause #2: Blocked Condensate Drain Line

Situated next to the condenser unit outside your home, the condensate line serves to drain water from the drip pan. However, mold, mildew, and sludge can accumulate within the line, causing blockages. Once the blockage is cleared, the unpleasant smell should dissipate.

Possible Cause #3: Excess Moisture in Ducts

If a musty smell is emanating from your AC unit, it’s possible that your ductwork harbors mold or mildew, which then permeates through your vents. Scheduling routine cleaning can eliminate the musty odor originating from your ductwork.

Possible Cause #4: Blocked Air Filter Resulting in Frozen Condenser Coil

A dirty air filter can lead to water droplets accumulating on the evaporator coils. As the AC unit’s refrigerant cools the air, these droplets freeze. To restore maximum airflow, a professional HVAC technician must allow the condenser coil to thaw and replace the filters.

Can a Musty AC Make You Ill?

Exposure to mold can contribute to upper respiratory health problems. Therefore, if your air conditioner emits an unpleasant odor, it’s advisable to identify the cause and rectify the situation promptly.

How Can I Eliminate the Musty Smell from My Air Conditioner?

If your air conditioner consistently emits a musty smell, seeking assistance from a professional may be necessary. The HVAC technicians at HOP Energy can provide the help you need. While HOP Energy is widely recognized for its heating oil delivery service, we also offer comprehensive HVAC services, maintenance, and installations throughout the Northeast. When faced with a foul-smelling AC, simply complete the contact form on the HOP Energy website. We will identify the source of the musty odor, resolve the problem, and offer suggestions to enhance your home’s indoor air quality.

Key Takeaways About Air Conditioners

  • A properly functioning air conditioning unit should not emit a musty smell. The presence of such an odor indicates an issue with your air conditioning system.
  • Musty odors may result from a full drain pan, a blocked drain line, excess moisture in your air vents, or a clogged air filter. All these problems can be rectified by a reputable AC repair service provider.
  • Mold spores can pose health risks to both humans and pets.
  • HOP Energy offers professional AC repair and maintenance services.

Cleaning A Mitsubishi Mini Split Air Conditioner

Cleaning a Mitsubishi Mini Split AC

Cleaning a Mitsubishi mini split air conditioner is an essential task for homeowners who want to maintain optimal performance and indoor air quality. Mini split systems have become popular among homeowners due to their ability to provide precise heating and cooling control for individual rooms, along with potential energy savings. By following these simple steps, you can ensure that your Mitsubishi mini split remains efficient and effective in keeping your home comfortable.

Step 1: Cut The Power

Turn off the system by turning off the circuit breaker for the indoor and outdoor units.

Step 2: Clean The Filters

Lift the front cover of the indoor unit and remove the filters. Vacuum the filters with a brush attachment. If the filters are heavily soiled, wash them with soap and warm water, ensuring they are completely dry before reinserting them.

Step 3: Clean The Heat Exchanger

Use the brush attachment of your vacuum to clean the delicate fins of the heat exchanger inside the unit.

Step 4: Clean The Fan

Remove the bottom cover and clean the fan blades, fan motor, and cooling coils using a vacuum. If there is visible dust, gently wipe the area with a dry cloth.

Step 5: Clean The Condensate Pan

Wipe up any moisture in the pan located at the bottom of the unit. Ensure the drain hose is functioning correctly. If there is standing water or blockage, use white vinegar to clear it.

Step 6: Remove Debris

To maintain the energy efficiency of a ductless system, you need to clean the loose debris from the indoor and outdoor units.

Step 7: Vacuum and Wash Grilles

Use a vacuum or dry cloth to remove dirt from the heat exchange grilles. If the grilles are heavily soiled, use liquid soap and a garden hose to wash them.

Step 8: Clean Inside Of Housing

Unscrew and remove the top of the outdoor unit, wipe down the fan blades, and vacuum the interior, including the condenser coils.

Step 9: Clean Condensate Pan and Hose

Wipe the drain pan with a cloth and address any mold growth with a bleach solution. Clean the hose with vinegar.

To ensure proper maintenance of all your HVAC systems, including your Mitsubishi mini split air conditioner, consider contacting HOP Energy. Our technicians can inspect your equipment and provide necessary maintenance recommendations. Simply fill out the contact form on our website to schedule an appointment.